Customizing the Budgeting and Tracking Multiple Projects Template

This is the final product of this blog… a related documents data view that functions and looks like the related tasks, issues and milestones on the Budgeting and Tracking Multiple Projects Template.
At my organization, we have found the Budgeting and Tracking Multiple Projects Template extremely useful. For those of you have not seen this template I urge you to go to http://www.wssdemo.com/application/default.aspx and view an example of this handy template. The link is in the left nav 2cnd one after the heading Template Type: Server Admin.
In a nutshell the template allows you to track all you projects as you normally would. When you click on a detail view of the project, you also get a related tasks, related issues and related milestones data views on the same page. Any tasks, issues or milestones you add on this page will be associated with that particular project and will rollup onto a nice looking dashboard.
However… like anything, SharePoint gets you 95% there and leaves you to your own devices to accomplish the last 10 feet.
I was asked by a business user to add a related documents view. Made sense to me, so now you have all your tasks, issues, milestones and documents on one convenient page. Perhaps people would like to add a related links or related announcements or calendar items, so I set out to figure a way to add these items with one goal in mind, make a no .net code solution that a user with SharePoint designer could do. Here is the fruit of my labors.
First you must have the Budgeting and Tracking Multiple Projects Template. It is one of the Fantastic 40 Microsoft templates for SharePoint. If you don’t already have it, you will need a farm administrator to install it for you. If you have these permissions and want to do it, here are the templates and instructions.
Second you must have SharePoint Designer and the permissions to use it, other than that you are good to go!
Finally, you can do this on the detail view of any list, not just the above template.
Step 1: Create a new Document Library
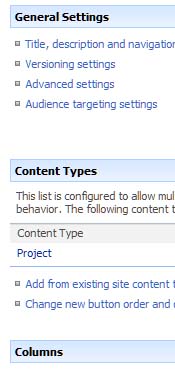
I called mine Project Documents, call yours whatever you would like. Go into Settings then Advanced Settings and click on Yes to Allow management of content types. This allows you to add a new column to the Document Library Content type.
Step 2: Add a new lookup column to the Document Library
It makes no difference what you call this field, but I called mine Project. You will want to point it at the Item column on the Projects List. Now go back into your new library and add a few documents and select a couple of projects in your newly created lookup column that they belong to.
Step 3: Open up the DispForm.aspx page in the Lists-Projects Directory
Make a small text edit to make sure you have the right page, and now go get a cup of coffee or another favorite beverage, because the next part is a little complex if you’re not used to looking at code.
Step 4: Click below the Related Milestones Data View and insert a new Data View
In your data source, choose your document library you just made and pick the fields you would like to display. I recommend the minimum of the fields “item” and “url path”
Step 5: Add a Query string parameter called “projectname”
Click on the arrow in the data view box and select parameters from the menu Click “New Parameter” Pick “Query string” for Parameter Source and “projectname” for Query String variable.
Now click on the arrow again and this time select Filter. Pick the Name (for use in forms) field when it equals [projectname].
Step 6: Add a div tag around the title
The title of the page is the name of the item you are looking at in detail. For example if you click on the Project called “Upgrade Servers” The title of the detail page will be at the top of the page – Projects List: Upgrade Servers. If we select this title in design view, we will see that the this title field is an asp tag called
<sharepoint:listitemproperty id=”ID_ItemProperty” runat=”server” maxlength=”40″></sharepoint:listitemproperty>
Add a div tag around this asp tag like this:
<span style="font-size:x-small;"><div id="projectname" style="display:inline">
<div id="projectname" style="display:inline">
<SharePoint:ListItemProperty id="ID_ItemProperty" MaxLength=40 runat="server"/>
</div>
This div tag allows you to grab the title of the item you want to filter your related documents on.
Step 7: Add the following Javascript Code
Add this code directly after an existing javascript code snippet on the dispForm.aspx page
<script type="text/javascript">
function querySt(ji)
{
hu = window.location.search.substring(1);
gy = hu.split("&");
for (i=0;i<gy.length;i++)
{
ft = gy[i].split("=");
if (ft[0] == ji)
{
return ft[1];
}
}
}
var projectname = querySt("projectname");
var checked = querySt("projectname");
var url=window.location
if (!projectname && !checked)
{
projectname=document.getElementById("projectname").innerHTML
checked=1
url=url+"&projectname="+projectname+"&checked="+checked
window.location = url
}
</script>
Now select a project on the main page. Only the documents that have that project listed in the lookup field Project, should appear. Test to make sure it works
Step 8: Fix up the view to look the way you want
This is perhaps the most tedious and time consuming part of adding a related list, getting it to look the way you want.
Select the table, click on the arrow for the data view and click edit columns. I used the columns Item, Modified and Modified by.
Find the following in the related documents view
xsl:value-of select=”@Title”/>
and replace with
<a href="{@FileRef}">
<xsl:value-of select="@Title"/>
</a>
This will display the item as a link to the document.
Make two new table rows right after the start of the table and add the title “Related Documents” to the second row.
<table border="0" width="100%" cellpadding="2" cellspacing="0">
<tr>
<td class="ms-WPHeader" colspan="99">
<xsl:text xmlns:ddwrt="http://schemas.microsoft.com/WebParts/v2/DataView/runtime" ddwrt:nbsp-preserve="yes" disable-output-escaping="yes">&nbsp; </xsl:text>
</td>
</tr>
<tr>
<td class="ms-WPHeader" colspan="99">
<h3 class="ms-standardheader ms-WPTitle">Related Documents</h3></td>
</tr>
Add the following code right before the closing table tag for the “upload new document link”.
<tr valign="top">
<td colspan="99" class="ms-vh">
<a href="Enter the url of your new item for the library here">
Upload a new Document...
</a></td>
</tr>


 Posted by wyly